A touch display for home assistant
For a long time I did not want to interact with Home Assistant through my phone or laptop. I tried voice, but getting it local and fast enough to actually use during the day was a bit much. What I wanted was a normal wall panel: something I can configure from Home Assistant and use to control the house, locally. Something like this:
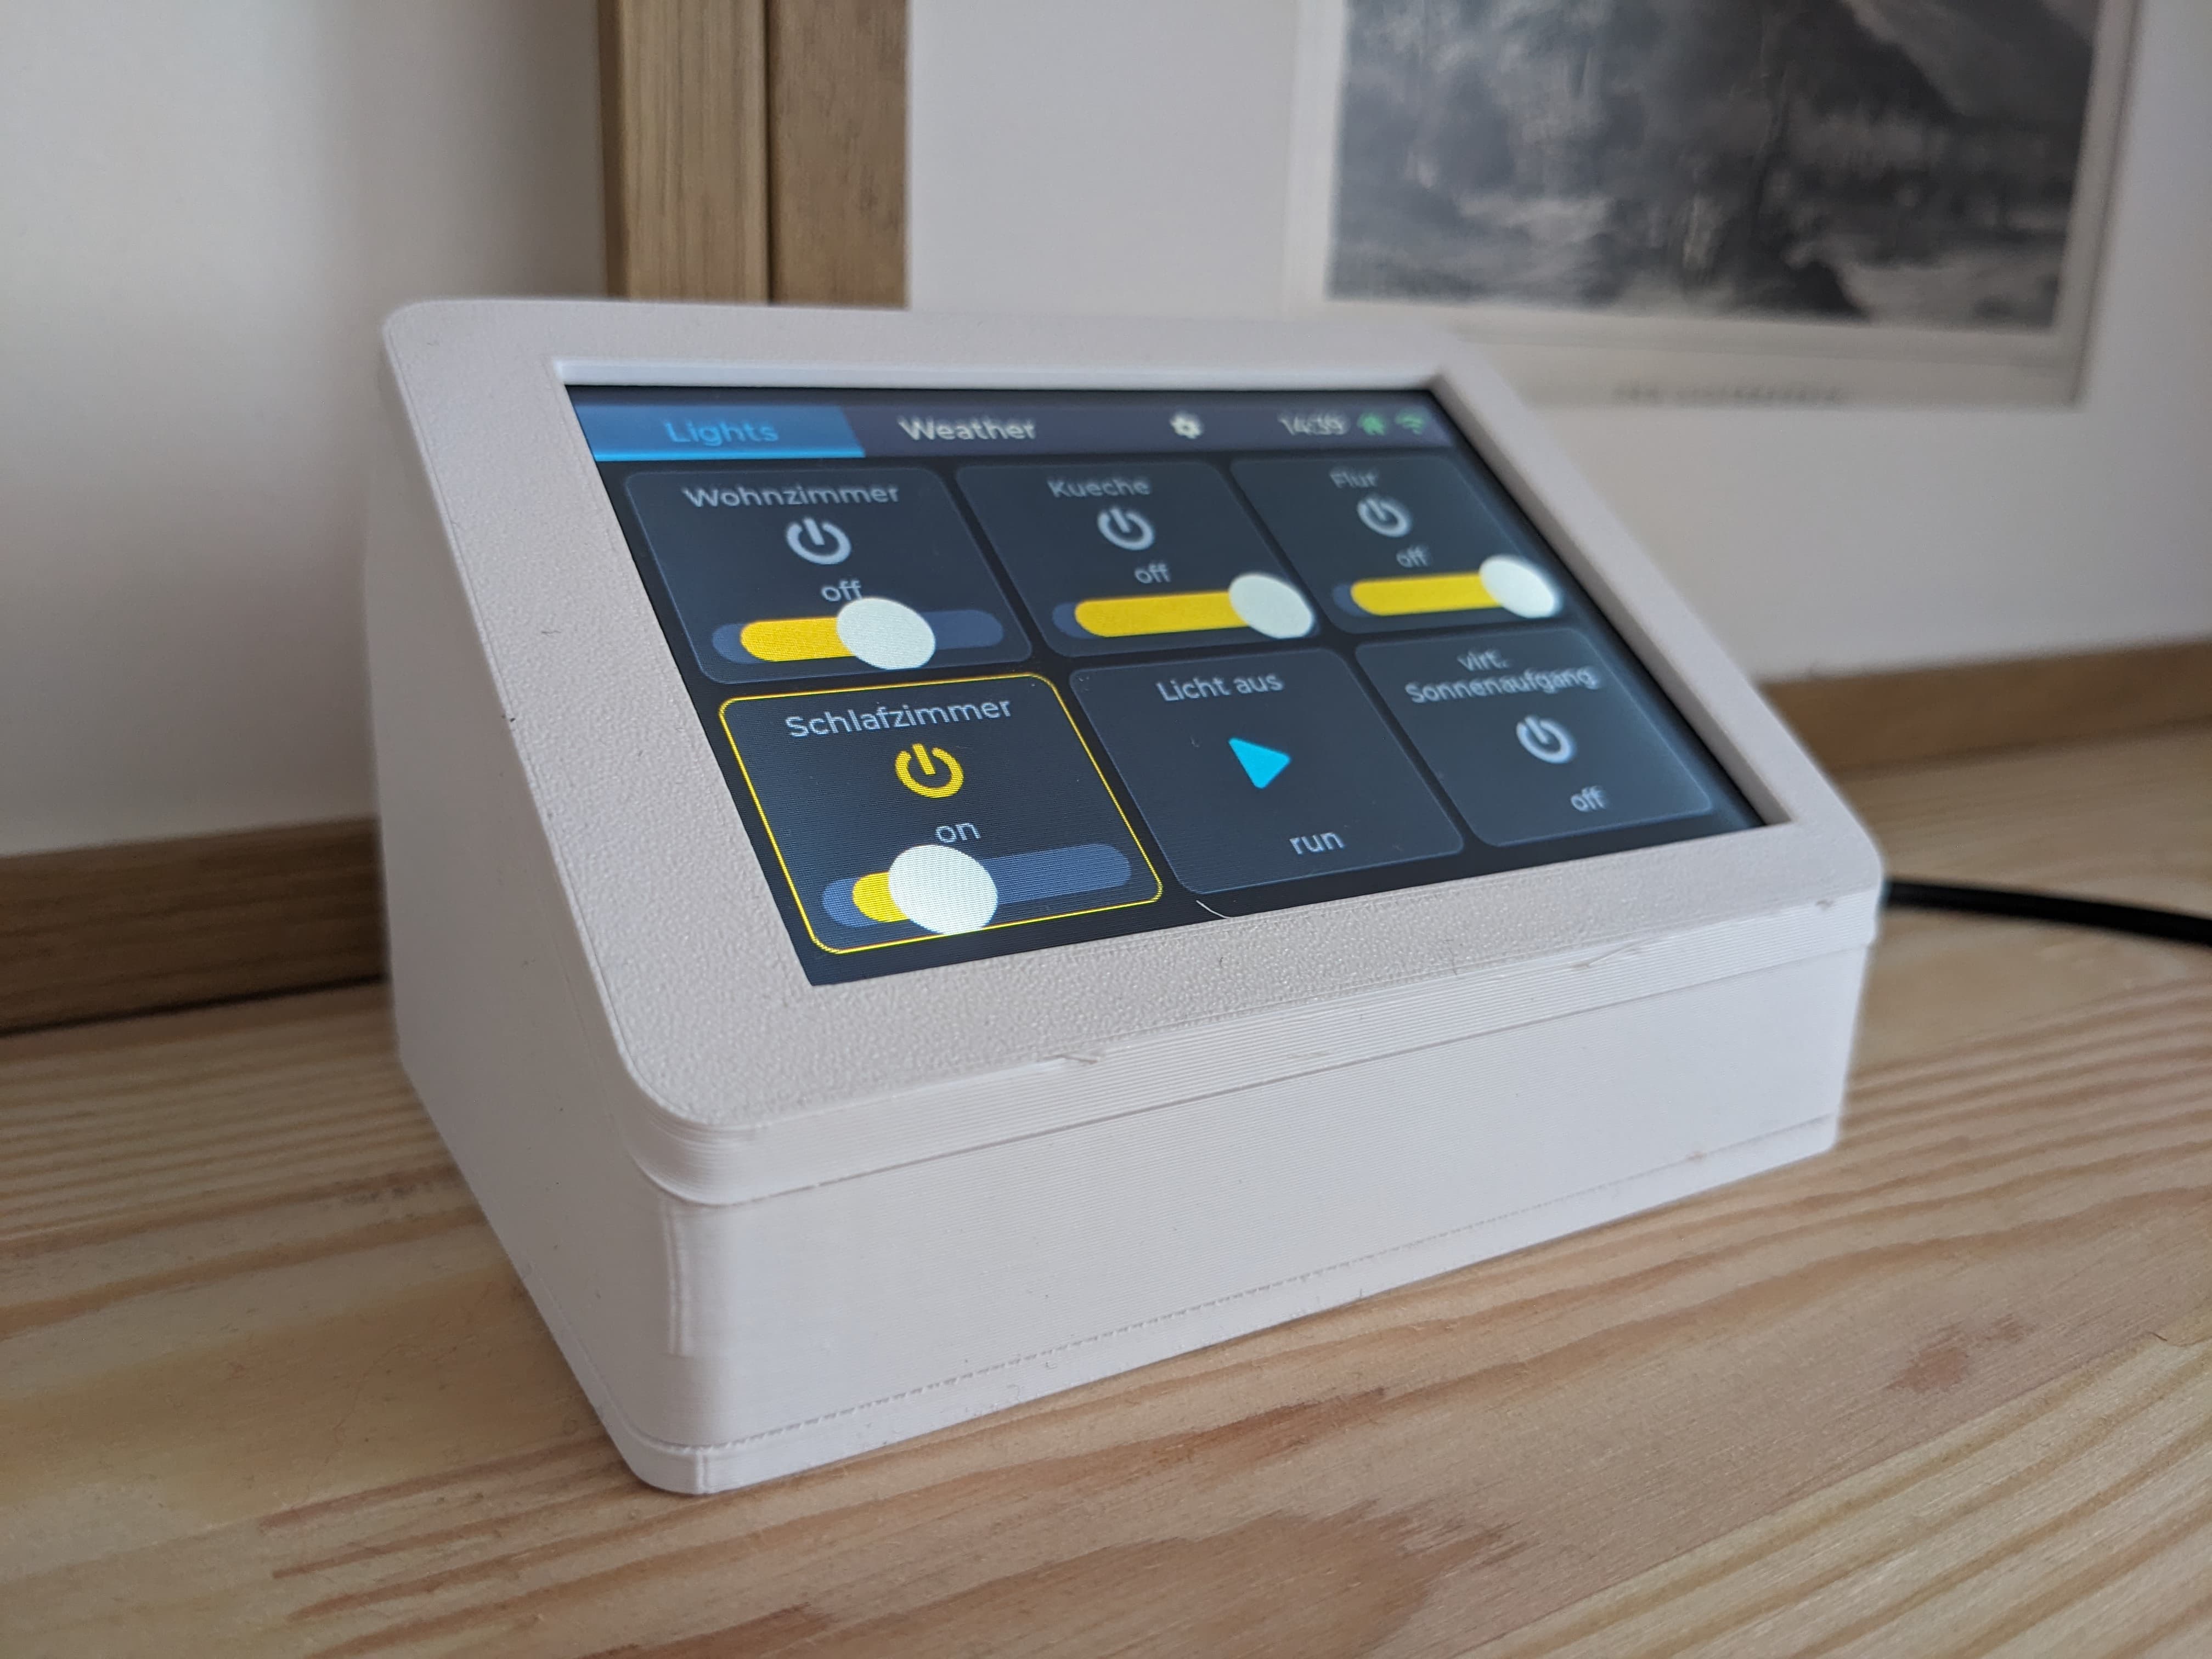 ] ] |
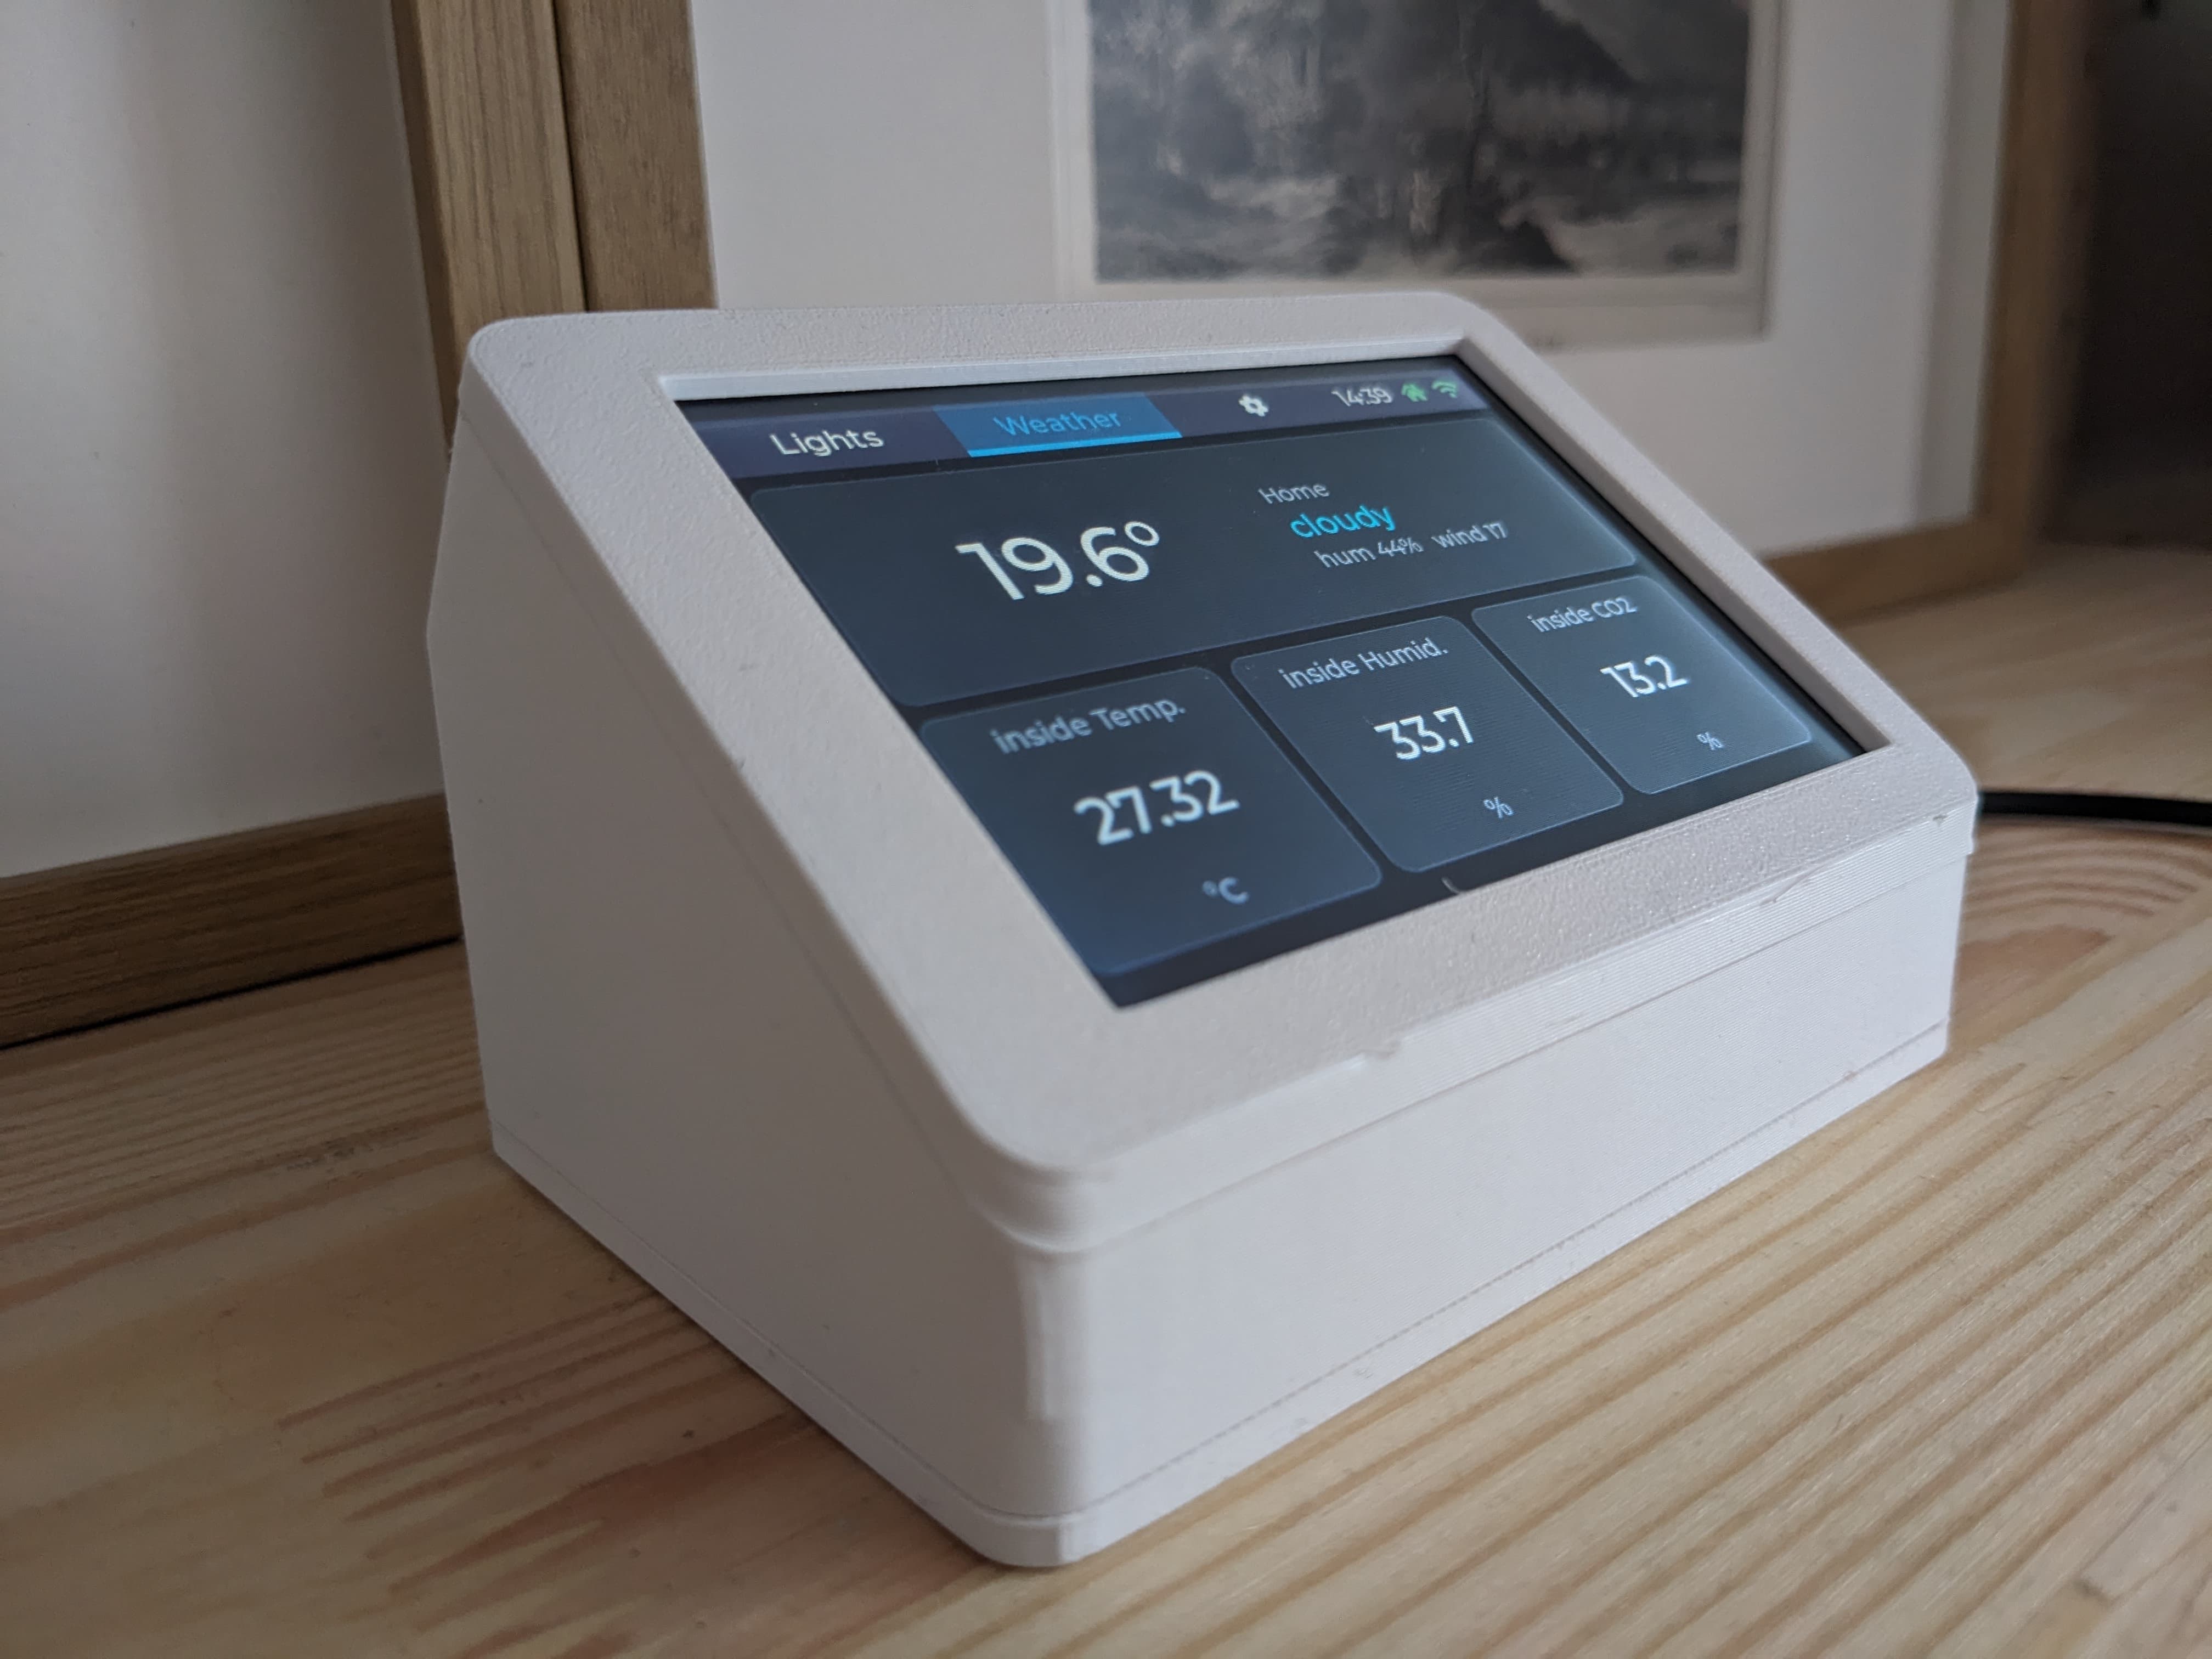 ] ] |
All of that for not much money and not much overhead.
Surprisingly, I did not find many projects that were just that, so I built my own.
An ESP32 and a cheap 4 inch touch display felt like enough hardware, which in the end was absolutely enough (even with fairly easy wiring which you can check out 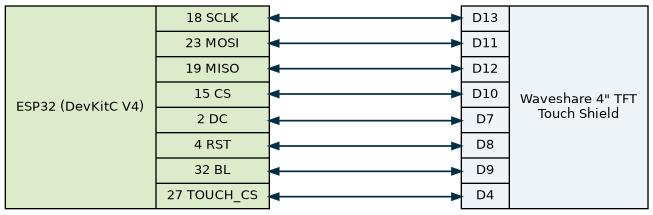 ], just make sure that you set the touch shield in SPI mode).
The parts are quite cheap, Home Assistant already has the state, and the WebSocket API is documented. So i created ha_display.
There are related projects, openHASP, the ESPHome LVGL component, NSPanels, but a small, dumb panel that only draws buttons and calls services still feels rare. Also i wanted to edit the buttons and entities which are displayed on the display from Home Assistant, so i don’t need to flash the ESP after a slight change over and over again.
This way, each panel talks to Home Assistant over its native WebSocket API and fetches its layout as a JSON file from =/config/www/ha_display/=. In that file you define pages, for example one for lights and one for weather:
1
2
3
4
5
6
7
8
9
10
11
12
13
14
15
16
17
18
19
20
21
22
23
24
25
26
27
28
29

  {
    "name": "Living Room",
    "pages": [
      { "title": "Lights", "widgets": [
          { "type": "light",  "entity": "light.ceiling",
            "label": "Ceiling", "brightness": true },
          { "type": "light",  "entity": "light.shelf",
            "label": "Shelf" },
          { "type": "toggle", "entity": "switch.tv_plug",
            "label": "TV plug" },
          { "type": "button", "entity": "scene.movie_night",
            "label": "Movie night" },
          { "type": "button", "entity": "script.good_night",
            "label": "Good night" },
          { "type": "toggle", "entity": "automation.motion",
            "label": "Motion autom." }
      ]},
      { "title": "Weather", "widgets": [
          { "type": "weather", "entity": "weather.home",
            "label": "Home" },
          { "type": "sensor",  "entity": "sensor.outdoor_temp",
            "label": "Outdoor" },
          { "type": "sensor",  "entity": "sensor.humidity",
          "label": "Humidity" }
          { "type": "sensor",  "entity": "sensor.power_usage",
            "label": "Power" }
      ]}

  }
which shows up on the display like this:
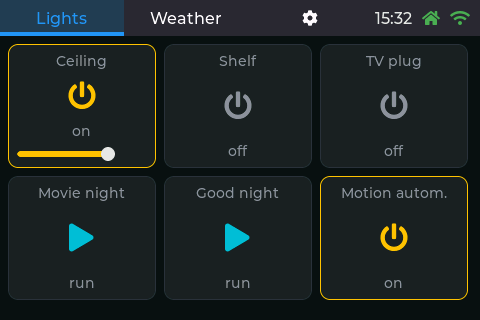 ] ] |
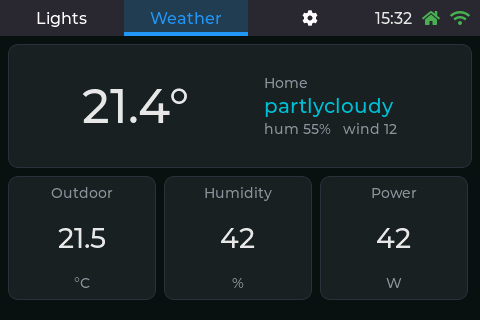 ] ] |
Edit the file, hit reload, the UI rebuilds. No need to flash the ESP again. A second room is the same firmware with a different node id.
I did not want an endless loop of flash, look, tweak, to build the UI, so there is a PC simulator that runs the same UI against Home Assistant before anything goes onto the ESP. As the UI is LVGL to build this was not too complicated.
Obviously the display doesnt stay on the entire time. It goes dark after in the config specified time and goes on again after you touch it.
I designed a case in FreeCAD which you can check out here.
If you have any questions regarding the project, don’t hesitate to contact me.